 Hello World KitchenBeta
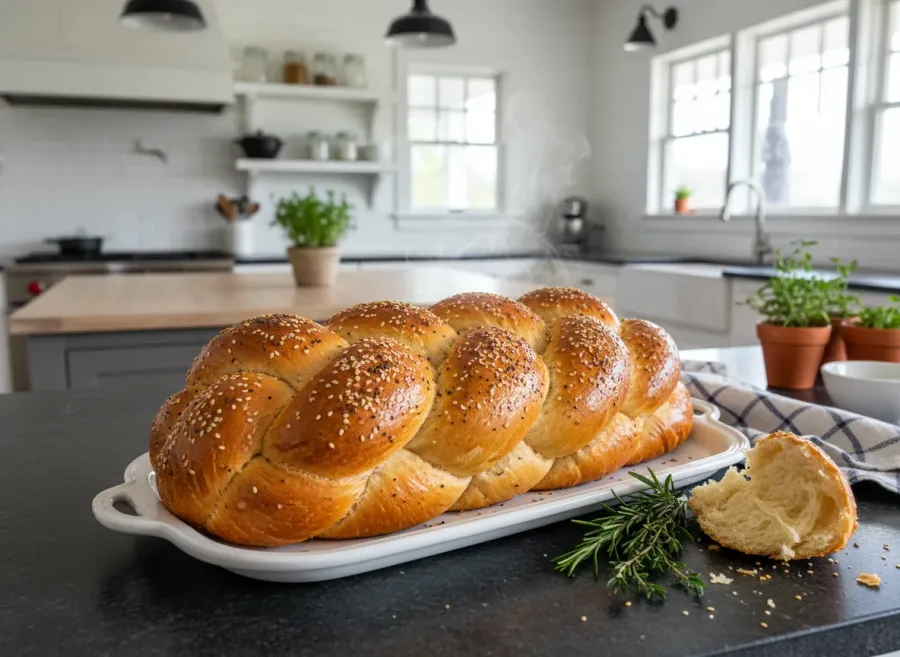
A beautifully golden, pillowy-soft, and slightly sweet enriched bread. This recipe focuses on achieving the perfect dough texture and guides you through a stunning, traditional 6-strand braid for a glossy, bakery-quality finish.
Ingredients
Yeast Mixture
- 2.25 teaspoons Active dry yeast — 1 standard packet
- 1 cup Warm water — Between 105°F and 110°F
- 1 teaspoon Granulated sugar — To feed the yeast
Dough
- 4.5 cups Bread flour — Plus extra for dusting. Can substitute all-purpose flour, but bread flour yields better chew.
- 0.33 cup Granulated sugar
- 2 tablespoons Honey — Adds moisture and depth of flavor
- 0.33 cup Vegetable oil — Canola or a light olive oil works well
- 2 whole Large eggs — Room temperature
- 1 whole Large egg yolk — Room temperature, adds richness
- 1.5 teaspoons Fine sea salt
Egg Wash & Topping
- 1 whole Large egg
- 1 tablespoon Water
- 1 pinch Pinch of salt — Helps break down the egg proteins for a smoother wash
- 2 tablespoons Sesame seeds or poppy seeds (optional) — For sprinkling
Instructions
-
In a small bowl, whisk together the warm water, 1 teaspoon of sugar, and the active dry yeast. Let it sit for 5-10 minutes until the mixture is frothy and bubbly. This indicates the yeast is alive and active.
~10 minIf the mixture doesn't bubble, your yeast may be dead or the water was too hot. Start over to ensure a proper rise. -
In the bowl of a stand mixer, whisk together the remaining 1/3 cup sugar, honey, vegetable oil, 2 whole eggs, and 1 egg yolk until well combined.
~3 minUsing room temperature eggs prevents the warm yeast mixture from cooling down too quickly. -
Add the activated yeast mixture to the wet ingredients and gently stir. Add 4 cups of the bread flour and the salt. Attach the dough hook and mix on low speed until a shaggy dough forms.
~5 minAlways add salt with the flour, never directly onto the yeast, as high concentrations of salt can kill yeast. -
Increase the mixer speed to medium-low and knead for about 8-10 minutes. If the dough is very sticky, gradually add the remaining 1/2 cup of flour, a tablespoon at a time. The dough should clear the sides of the bowl, feel soft, supple, and slightly tacky but not sticky.
~10 minPerform the windowpane test: stretch a small piece of dough; if it stretches thin enough to let light through without tearing, gluten is properly developed. -
Form the dough into a smooth ball. Lightly oil a large bowl, place the dough in the bowl, and turn it to coat all sides with oil. Cover tightly with plastic wrap or a damp kitchen towel.
~2 minA lightly oiled bowl prevents a dry crust from forming on the dough as it rises. -
Let the dough rise in a warm, draft-free place until doubled in size, about 1.5 to 2 hours.
~90 minYou can use the 'proof' setting on your oven, or place it in an unlit oven with the light turned on. -
Gently punch down the dough to release the air. Turn it out onto a very lightly floured surface. Use a kitchen scale to divide the dough into 6 perfectly equal pieces.
~5 minWeighing the dough ensures an even, symmetrical braid. -
Roll each piece of dough into a smooth ball, then let them rest for 10 minutes covered by a towel. This relaxes the gluten, making them easier to roll into ropes.
~10 min -
Roll each ball into a long rope, about 14-16 inches long, tapering the ends slightly. If the dough shrinks back, let it rest for another 5 minutes before rolling further.
~5 minTapered ends make the final loaf look neat and professional. -
Line up the 6 ropes parallel to each other on a parchment-lined baking sheet. Pinch the top ends firmly together and tuck them slightly underneath. Splay the ropes out so you can clearly see them.
~2 min -
Execute the 6-strand braid using this repeating pattern: Always start with the strand on the far right. Take the far-right strand and weave it to the left: over 2 strands, under 1 strand, and over 2 strands. Now the far-right strand is on the far left. Repeat this exact process, always picking up the NEW far-right strand: over 2, under 1, over 2. Continue until you reach the end of the dough.
~5 minKeep the tension even but not too tight, as the dough needs room to expand during the second rise. -
Pinch the bottom ends together firmly and tuck them neatly underneath the loaf.
~1 min -
Lightly cover the braided loaf with greased plastic wrap or a clean towel. Let it rise in a warm place for 45-60 minutes, until it looks puffed and passes the poke test (a gentle poke should spring back slowly and leave a slight indentation).
~45 minDo not overproof, or the braid will lose its definition during baking. -
Preheat your oven to 350°F (175°C) about 20 minutes before the rising is done. Prepare the egg wash by whisking the egg, water, and salt until very smooth.
~5 min -
Using a pastry brush, gently apply an even layer of egg wash over the entire loaf, making sure to get into the crevices of the braid. For a deeply golden, shiny crust, let the first coat dry for 5 minutes, then apply a second coat. Sprinkle generously with seeds if using.
~5 minThe double egg-wash is the secret to a high-gloss, bakery-style finish. -
Bake in the center of the preheated oven for 30-35 minutes. If the challah is browning too quickly at the 20-minute mark, tent it loosely with aluminum foil. The bread is done when it is deep golden brown and reads 190°F (88°C) in the center with an instant-read thermometer.
~35 minTapping the bottom of the loaf should produce a hollow sound. -
Transfer the challah to a wire cooling rack and allow it to cool completely before slicing.
~60 minSlicing while hot will compress the crumb and make the bread seem gummy.
Nutrition
Equipment
- Stand mixer with dough hook (optional)
- Large mixing bowls
- Measuring cups and spoons
- Kitchen scale
- Baking sheet
- Parchment paper
- Pastry brush
- Clean kitchen towel or plastic wrap
Tips & Storage
- Ensure your water is not hotter than 110°F to avoid killing the yeast.
- For the fluffiest texture, accurately measure flour by weight (1 cup of bread flour is roughly 120-125g).
- Do not skip the 10-minute rest after dividing the dough; it is crucial for relaxing the gluten so the strands don't shrink while rolling.
- For leftover challah, it makes the absolute best French toast or bread pudding.
- Storage: Store cooled challah in an airtight plastic bag or wrapped tightly in foil at room temperature for up to 4 days. For longer storage, slice and freeze in a zip-top freezer bag for up to 3 months.
Tags
🤖 This recipe was created with AI assistance. If you spot a mistake or something that doesn't look right, please report it.


